Hive Inspection – April 17
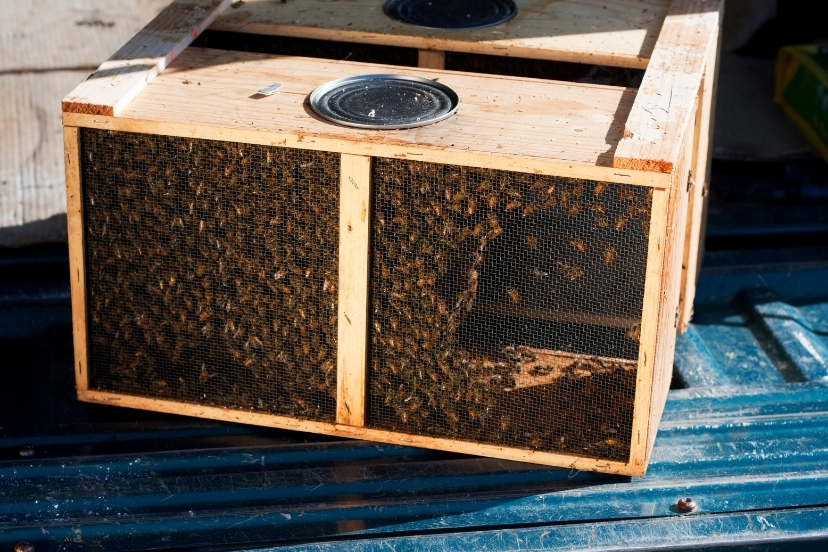
Though it’s only been 5 days since I hived my package bees, I’m going to take a quick look inside the hive.
I would actually prefer to wait another day or two.
But cold and rainy weather is forecast for the next several days, and the weather is beautiful today.
So I’m going to make sure that the queen has been released from her cage.
If by some chance she hasn’t, it should be safe by now to go ahead and release her.
It’s somewhat unlikely that she’ll have started to lay eggs yet.Not impossible, though, so I’ll look for eggs, too.
Your First Hive Inspection?
If you’re planning to become a beekeeper, then this is the point at which you’ll make your very first hive inspection.
Nervous?
No need to be. This is where the fun really begins – watching the progress of your new bee hive.
To help you understand the process for when you make your first hive inspection, I’ll carefully explain what I’m doing each step of the way.
Smoking is NOT Hazardous to Your Health
Smoking your bees, that is. But not smoking them might be. Or at least, not using your bee smoker might make your first hive inspection VERY memorable!
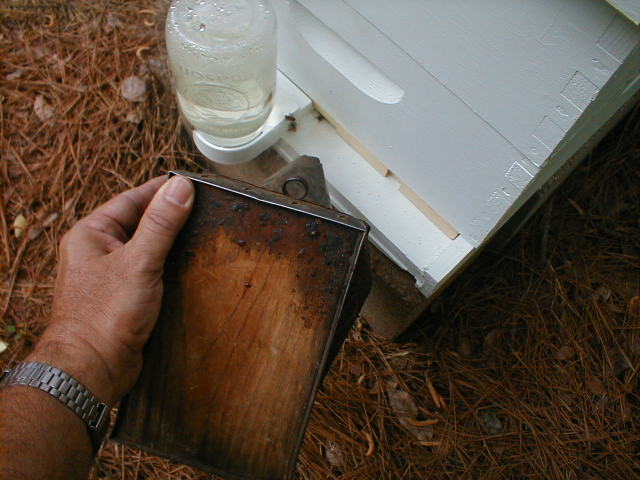
So I’m going to start by getting my ancient old bee smoker going.

Dried pine needles are in abundance in my area, and they’re great for starting a smoker.
Just a small handful in the bottom of the smoker, a few pieces of the punky wood I use for smoker fuel, and a lit match is all it takes to get a nice fire going.
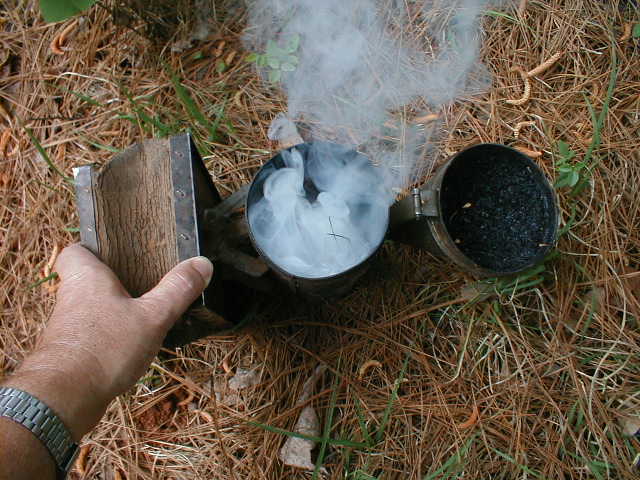
Once the fire is well established, I add some more smoker fuel, and close the lid. I’ll add plenty of smoker fuel, even though I expect to need the smoker for no more than a few minutes.
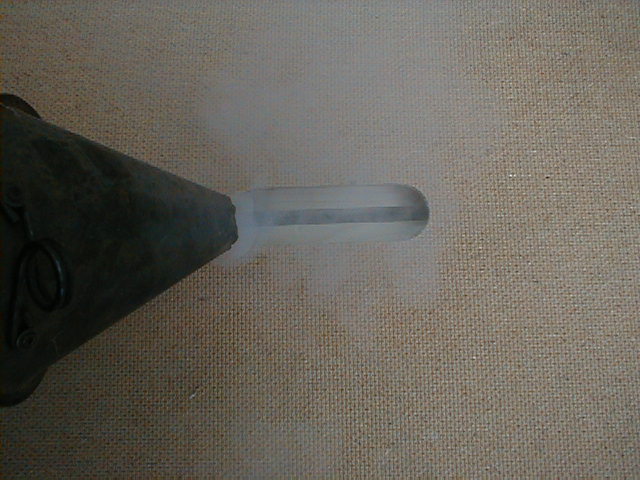
Running out of smoke in the middle of a hive inspection isn’t much fun! Before closing the lid of the bee smoker, I like to stuff a wad of green grass in the lid to cool the smoke.
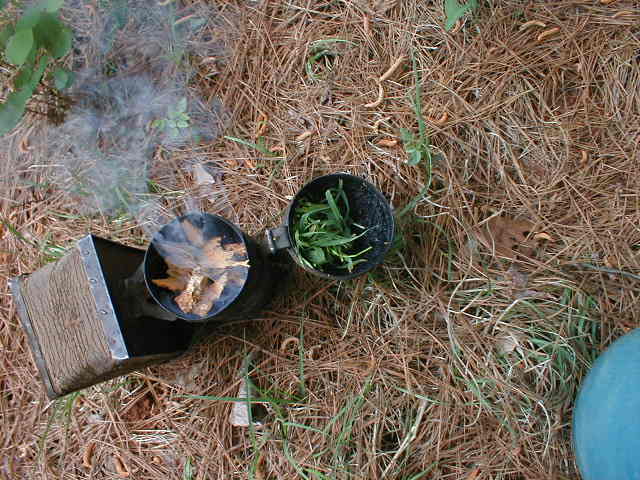
Does that really make a difference? I think it does, at least at first.
You want to be sure that you’re not blowing superheated air over the bees. That tends to negate the advantages of the smoke!
With my trusty old smoker puffing away, I’m ready to open the hive. While standing to the side of the hive (never stand directly in front of the entrance), direct a few puffs of smoke into the hive entrance.
Puff some smoke under the inner cover – either through the hole in the middle of the inner cover, or by inserting your hive tool under the cover and lifting it just a crack.
After puffing in the smoke, leave the inner cover in place for a couple of minutes.
Now, go ahead and slowly lift off the inner cover, puffing more smoke as you lift it. After the cover is off, puff a bit of smoke over the top bars of the frames.

Once I have the inner cover off, I usually jar it against the ground in front of the entrance to knock most of the bees off, and then set the inner cover aside. While I’m working, the bees jarred off the cover in front of the hive will be busy making their way back into the hive.
If I just left the bees on the inner cover and set it aside, they’d tend to take wing and be buzzing around me in confusion.
I like to put the outer cover on the ground, top side down. If I remove any supers from the hive as I work my way through the inspection, I’ll place them on the outer cover.
By laying the outer cover on the ground top side down, any honey leaking from supers stacked upon it will not be exposed to the outside (possibly encouraging robbing) when the hive is closed up.
Always Remove An Outside Frame First
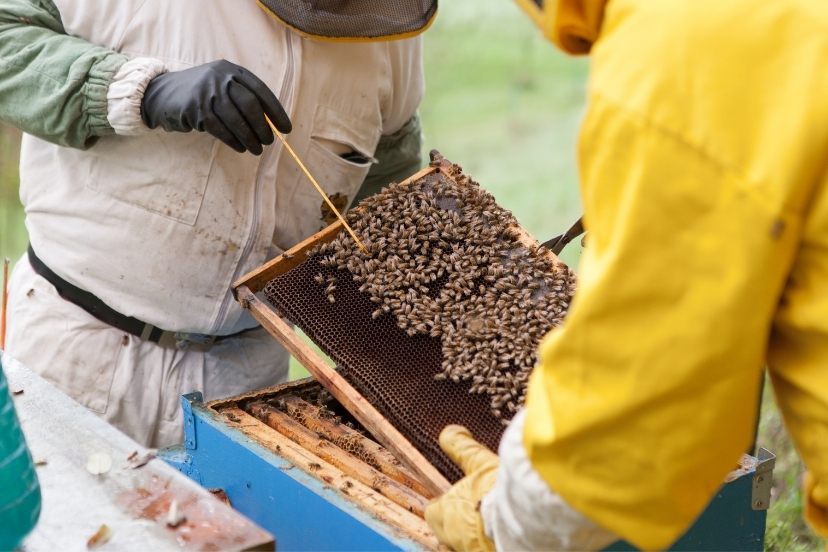
The best way to inspect frames is to remove an outside frame first.
Take a quick look at it to be sure the queen isn’t on it, and then set it aside. Now, use your hive tool to loosen frames, and then move them toward the extra space created.
That way, when you want to pull out a frame to examine it, you’ll have plenty of room on either side of it. You can pull the frame out without rolling or crushing bees against adjacent combs.
When you’re through, just scoot the frames back together, and put the outside frame back in its place.
Put the Hive Back Together the Way it Was
It’s best to put everything back together the way it was.
Put frames back in place where they were, and put supers back on in the same order and orientation they came off.
Unless you have a compelling reason to do otherwise, it’s usually best to leave the hive just as it was before the inspection.
The bees have everything arranged as is for a reason.
In fact, if the weather is still cool, you can do a great deal of harm by ‘reorganizing’ the hive – particularly the brood nest.
So What Did I Find On This Inspection?
I found that all is well.
The queen is out of her cage, so I discarded it. (See how that solid block of candy was chewed through?)
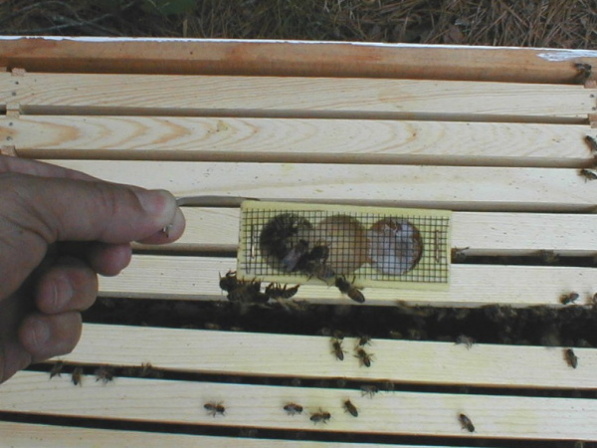
And though I wasn’t specifically trying to, I happened to spot the queen. Can you spot her in the photo? (Look for the green dot.)
The bees have a nice start on building comb, and have stored some of the sugar syrup in the new comb.
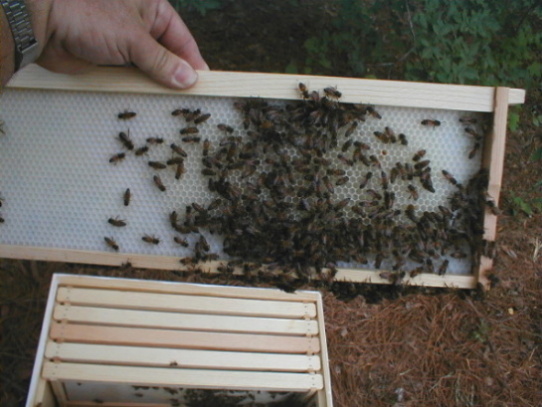
I didn’t see any eggs yet, but that’s not surprising. I’ll take another look in a week or so just to be sure the queen is laying.
In the meantime, I’ll keep an eye on the feeder jar, and refill it when needed.
When Working With Bees, Slow and Easy Does It
You’ll get along best with your bees if you make no abrupt movements. Move slow and easy, and work methodically.
I try to make certain that I never crush a bee while inspecting a hive. That’s not really possible; occasionally a bee will get crushed. It can’t be completely avoided.
But the mindset of attempting to not crush a single bee helps me to avoid the kind of rapid, sharp, careless movements that are likely to agitate the bees.
Which means they are less likely to agitate me!